Using EdgeDB AI
EdgeDB AI allows you to ship AI-enabled apps with practically no effort. It automatically generates embeddings for your data. Works with OpenAI, Mistral AI, Anthropic, and any other provider with a compatible API.
Enable extension in your schema
AI is an EdgeDB extension. To enable it, you will need to add the extension to your app’s schema:
using extension ai;Extension configuration
The AI extension may be configured via our UI or via EdgeQL. To use the
built-in UI, access it by running edgedb ui. If you have the extension
enabled in your schema as shown above and have migrated that schema change, you
will see the “AI Admin” icon in the left-hand toolbar.
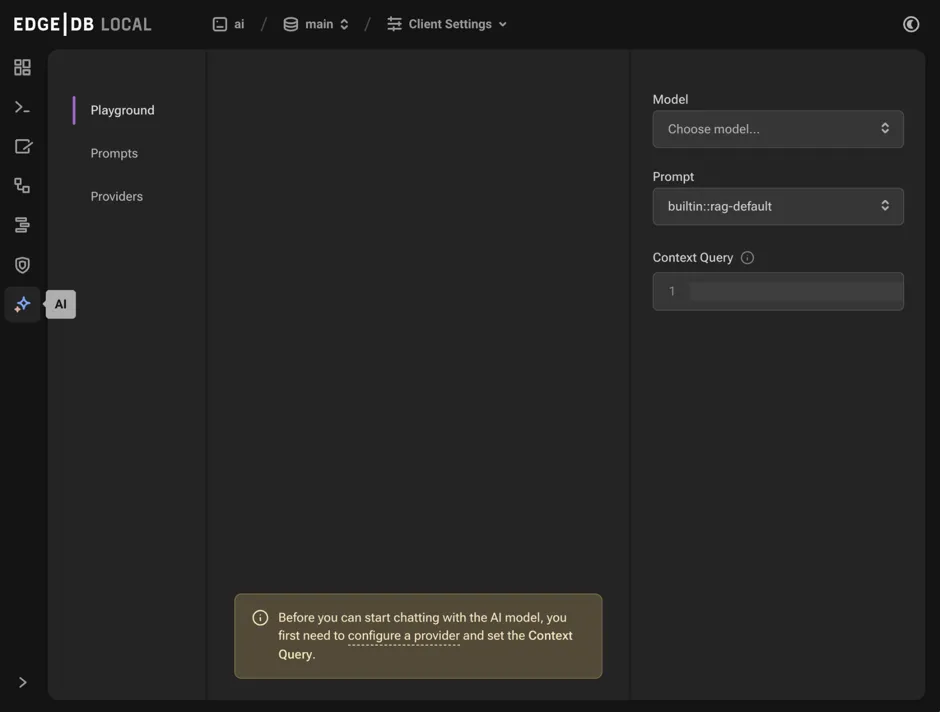
The default tab “Playground” allows you to test queries against your data after you first configure the model, prompt, and context query in the right sidebar.
The “Prompts” tab allows you to configure prompts for use in the playground. The “Providers” tab must be configured for the API you want to use for embedding generation and querying. We currently support OpenAI, Mistral AI, and Anthropic.
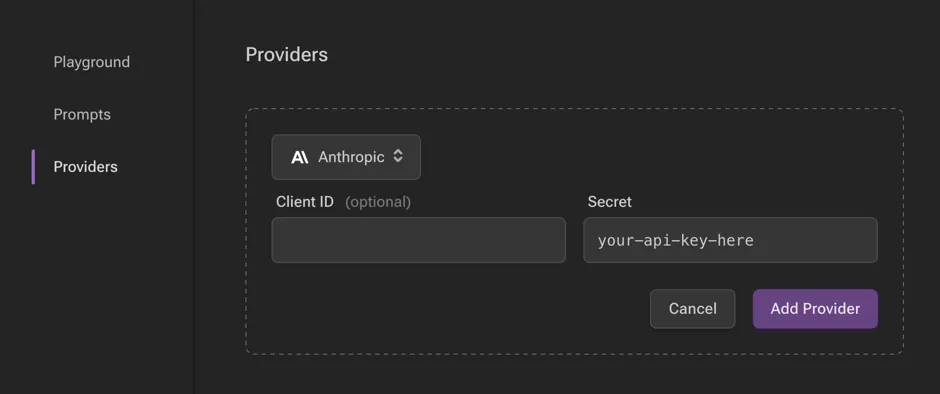
Configuring a provider
To configure a provider, you will first need to obtain an API key for your chosen provider, which you may do from their respective sites:
With your API key, you may now configure in the UI by clickin the “Add Provider” button, selecting the appropriate API, and pasting your key in the “Secret” field.
You may alternatively configure a provider via EdgeQL:
configure current database
insert ext::ai::OpenAIProviderConfig {
  secret := 'sk-....',
};
This object has other properties as well, including client_id and
api_url, which can be set as strings to override the defaults for the
chosen provider.
We have provider config types for each of the three supported APIs:
-
OpenAIProviderConfig -
MistralProviderConfig -
AnthropicProviderConfig
Usage
Using EdgeDB AI requires some changes to your schema.
Add an index
To start using EdgeDB AI on a type, create an index:
module default {
  type Astronomy {
    content: str;
    deferred index ext::ai::index(embedding_model := 'text-embedding-3-small')
      on (.content);
  }
};
In this example, we have added an AI index on the Astronomy type’s
content property using the text-embedding-3-small model. Once you have
the index in your schema, create and
apply your migration, and you’re ready
to start running queries!
The particular embedding model we’ve chosen here
(text-embedding-3-small) is an OpenAI model, so it will require an
OpenAI provider to be configured as described above.
You may use any of our pre-configured embedding generation models.
You may want to include multiple properties in your AI index. Fortunately, you can define an AI index on an expression:
module default {
  type Astronomy {
    climate: str;
    atmosphere: str;
    deferred index ext::ai::index(embedding_model := 'text-embedding-3-small')
      on (.climate ++ ' ' ++ .atmosphere);
  }
};
When AI indexes aren’t working…
If you find your queries are not returning the expected results, try
inspecting your instance logs. On an EdgeDB Cloud instance, use the “Logs”
tab in your instance dashboard. On local or CLI-linked remote
instances, use edgedb instance logs -I
<instance-name>. You may find the problem there.
Providers impose rate limits on their APIs which can often be the source of
AI index problems. If index creation hits a rate limit, EdgeDB will wait
the indexer_naptime (see the docs on ext::ai configuration) and resume index creation.
If your indexed property contains values that exceed the token limit for a single request, you may consider truncating the property value in your index expression. You can do this with a string by slicing it:
module default {
  type Astronomy {
    content: str;
    deferred index ext::ai::index(embedding_model := 'text-embedding-3-small')
      on (.content[0:10000]);
  }
};
This example will slice the first 10,000 characters of the content
property for indexing.
Tokens are not equivalent to characters. For OpenAI embedding generation, you may test values via OpenAI’s web-based tokenizer. You may alternatively download the library OpenAI uses for tokenization from that same page if you prefer. By testing, you can get an idea how much of your content can be sent for indexing.
Run a semantic similarity query
Once your index has been migrated, running a query against the embeddings is super simple:
select ext::ai::search(Astronomy, query)Simple, but you’ll still need to generate embeddings from your query or pass in existing embeddings. If your ultimate goal is retrieval-augmented generation (i.e., RAG), we’ve got you covered.
Use RAG via HTTP
By making an HTTP request to
https://<edgedb-host>:<port>/branch/<branch-name>/ai/rag, you can generate
text via the generative AI API of your choice within the context of a type with
a deferred embedding index.
Making HTTP requests to EdgeDB requires authentication.
$
curl --json '{ "query": "What color is the sky on Mars?",
"model": "gpt-4-turbo-preview",
"context": {"query":"select Astronomy"}
}' https://<edgedb-host>:<port>/branch/<branch-name>/ai/rag
{"response": "The sky on Mars is red."}Since LLMs are often slow, it may be useful to stream the response. To do this,
add "stream": true to your request JSON.
The particular text generation model we’ve chosen here
(gpt-4-turbo-preview) is an OpenAI model, so it will require an OpenAI
provider to be configured as described above.
You may use any of our supported text generation models.
Use RAG via JavaScript
@edgedb/ai offers a convenient wrapper around ext::ai. Install it with
npm install @edgedb/ai (or via your package manager of choice) and
implement it like this example:
import { createClient } from "edgedb";
import { createAI } from "@edgedb/ai";

const client = createClient();

const gpt4AI = createAI(client, {
  model: "gpt-4-turbo-preview",
});

const blogAI = gpt4AI.withContext({
  query: "select Astronomy"
});

console.log(await blogAI.queryRag(
  "What color is the sky on Mars?"
));